Canvas能做好多东西,本章就来一节实战性的东西吧。好多人来到这个博客的时候总是觉得后面这种点和线的背景很有意思,这种效果是怎么实现的呢,当然是使用Canvas了,我们这章就来实现一个简易版的这种星空连线图。
封装画点操作
对于Canvas画图,好多大神都是使用面向对象的思想来做的,在游戏编程中,往往把拥有特定功能的对象称为精灵。我们这里先简单的对点这个对象做一定的封装:
1 | function Point(canvas,options) { |
上面我们画点其实画的是一个半径很小的圆,当然也可以画长宽都很小的正方形,往往正方形只要 fillRect 一个API就可以了,而圆形往往需要好几个个API,所以效率上画正方形要比画圆更好,这里为了后面显示的更清楚就直接画圆了。
初始化Canvas
我们现在通过DOM操作来初始化一个canvas,这样做的好处是有利于把星空连线图封装成一个组件,当然我们这里并不讲解如何封装成一个可复用的DOM组件,只讲解怎么实现。
1 | // 自己创建canvas 并通过DOM操作添加到body中 |
我们手工创建一个Canvas并添加进来,最后设置宽高和样式,注意宽高使用 canvas.width 设置而不是 canvas.style.width 设置,这样不会缩放。
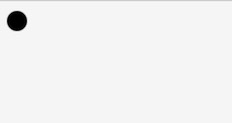
画一个点
很简单了,直接上代码:
1 | var p = new Point(canvas,{ |
直接看效果:
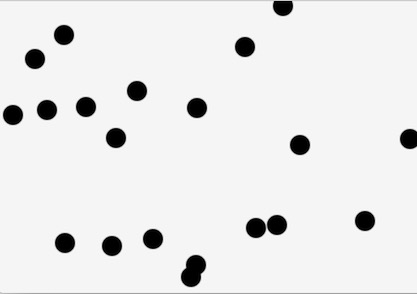
画20个点
现在我们画20个点吧:
1 | var cWidth = canvas.width; |
直接看效果,当然点的位置可能会不一样,毕竟是随机的:
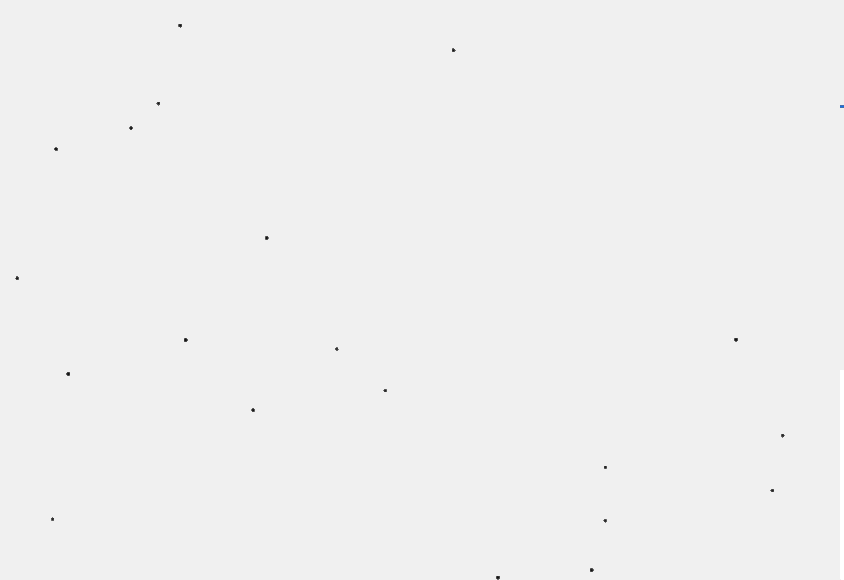
让点动起来
有了上几章知识的铺垫让点动起来很简单,当然我们现在不用那么大的点了,就是用默认的就可以了:
1 | var cWidth = canvas.width; |
此时效果如下,图片有点放大:
添加连线
添加连线也很简单,直接看完整代码吧:
1 | // 自己创建canvas 并通过DOM操作添加到body中 |
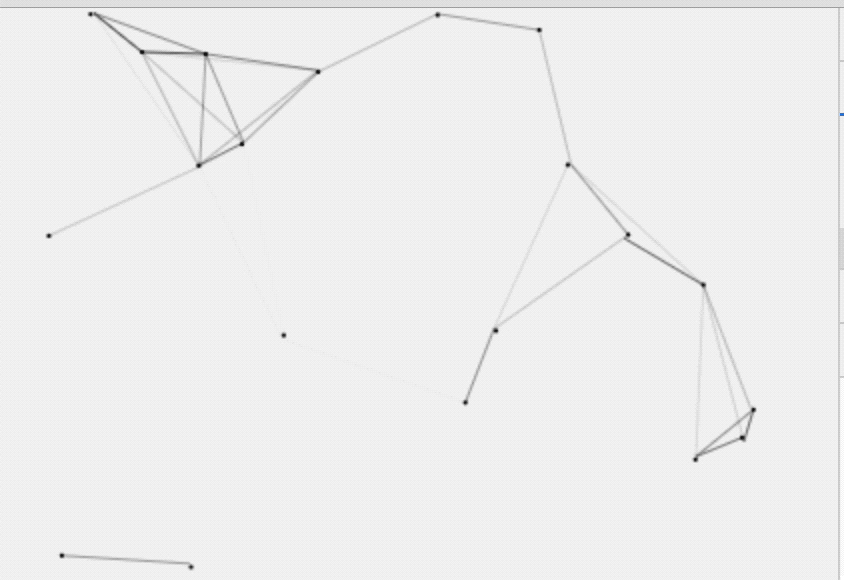
源码请点击这里。
我们已经大致实现了我们的效果,当然还需要做的是监听 window.resize 事件,以动态设置Canvas的宽高;也可以自己添加事件,让鼠标顶点的位置也加一个点;甚至可以改变速度,当两个点靠近的时候速度加大,远离的时候速度减小;当然可以把这个效果封装成一个可以复用的组件,放在你的项目中。这些后续事情就交给你了,相信你可以的。
我们博客背景中使用的是canvas-nest.js,你也可以观摩一下它源码,实现方式和我们的大同小异。